Home Server Vs Nas: Self Hosting Docker Virtual Machines And Home Lab Guide

Building your own digital space at home is more accessible than ever. Whether you want to run media servers, host websites, manage backups, or explore tech projects, you have two main options: a home server or a NAS (Network Attached Storage). Each offers unique benefits and fits different needs. This guide explains both options, focusing on self-hosting Docker, running virtual machines, and setting up a home lab. By the end, you’ll know which solution suits your home setup and tech goals.
What Is A Home Server?
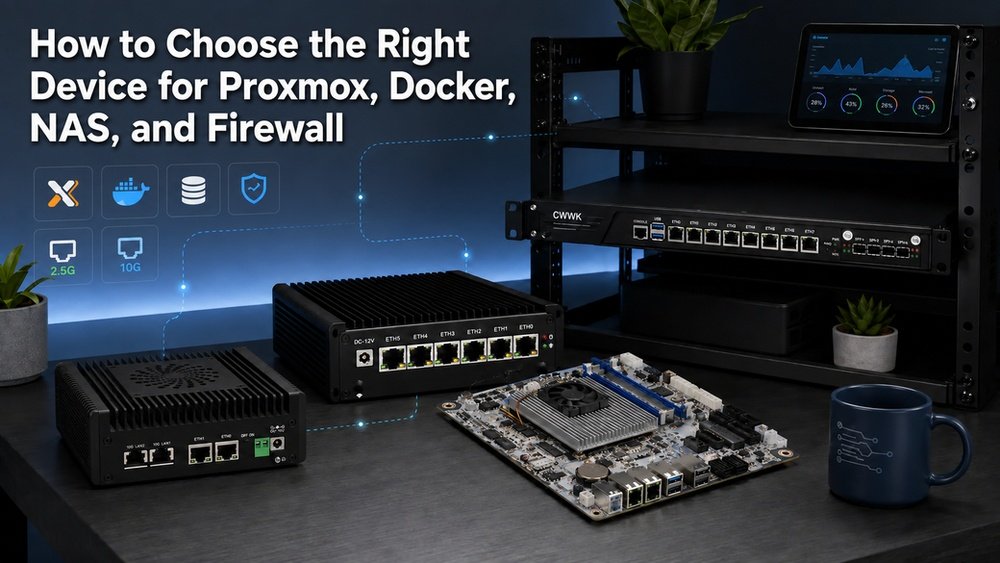
A home server is a computer designed to handle different tasks for your home network. Unlike regular laptops or desktops, a home server runs 24/7 and serves multiple devices like PCs, phones, and smart TVs. You can build a home server from old PC parts, buy a new small-form-factor PC, or purchase pre-built solutions.
Home servers can:
- Store and share files
- Host websites and apps
- Stream media (like Plex or Jellyfin)
- Run Docker containers and virtual machines
- Backup devices
- Handle smart home automation
You can customize a home server to fit almost any project. Popular operating systems for home servers include Ubuntu Server, Proxmox VE, TrueNAS Scale, and Windows Server.
Home Server Hardware Basics
Home server hardware can range from basic to advanced, depending on your needs:
- CPU: Multi-core processors (Intel i3/i5/i7, AMD Ryzen series) for multitasking
- RAM: 8GB minimum, 16GB+ for virtual machines and Docker
- Storage: SSDs for speed, HDDs for large data
- Network: Gigabit Ethernet for fast transfers
A simple home server might be an old desktop with a few upgrades. Advanced users may choose dedicated hardware with ECC RAM (Error-Correcting Code) for better reliability.
What Home Servers Do Best
The main strength of a home server is flexibility. You can install almost any software, from media servers to development tools. If you want to experiment, learn, or run multiple services at the same time, a home server gives you control.
What is a NAS (network-attached storage)?
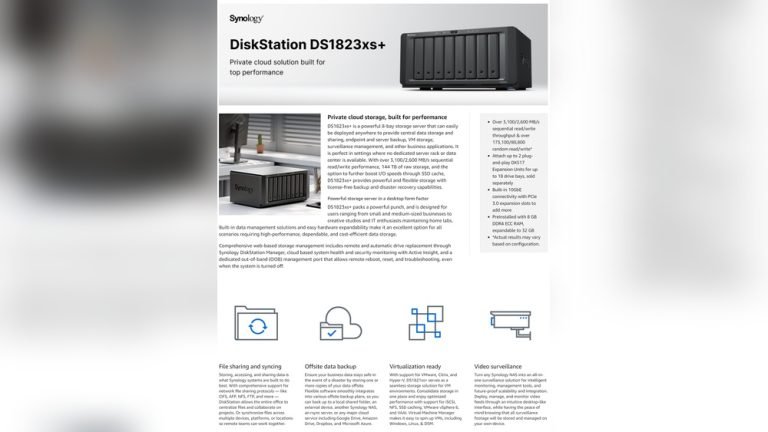
A NAS is a device that connects to your home network and stores files for everyone to access. Most NAS devices use custom software to make sharing, backing up, and streaming easy. Popular brands include Synology, QNAP, Asustor, and Western Digital.
NAS boxes are usually small, low-power, and designed to run quietly 24/7. They often have two or more hard drive bays for data protection using RAID (Redundant Array of Independent Disks).
NAS devices do more than file sharing. Modern NAS systems can:
- Stream movies and music
- Run Docker containers
- Host basic virtual machines (on some models)
- Back up PCs and phones automatically
- Sync files with cloud services
NAS is a “plug-and-play” solution. You don’t need much tech knowledge to get started.
NAS Hardware Overview
Most consumer NAS devices include:
- Low-power CPU (Intel Celeron, Realtek, ARM)
- 1–8GB RAM (some allow upgrades)
- Gigabit or 2.5/10 Gigabit Ethernet
- Multiple drive bays (2, 4, 6, or more)
Unlike home servers, NAS devices have limited upgrade options. You can usually add more RAM and hard drives, but not change the processor or motherboard.
What Nas Devices Do Best
NAS is perfect for users who want easy backups, file sharing, and media streaming with little setup or maintenance. They are reliable, energy-efficient, and come with polished apps for phones and computers.
Comparing Home Server vs. NAS: Core Differences
Choosing between a home server and a NAS is about your needs, skills, and budget. Here’s a side-by-side look at the main differences:
| Feature | Home Server | NAS |
|---|---|---|
| Flexibility | Very high | Moderate |
| Ease of Use | Medium to hard | Easy |
| Expandability | High (upgrade CPU, RAM, disks) | Low to moderate (add RAM, disks) |
| Power Usage | Higher (depends on hardware) | Low (optimized for 24/7 use) |
| Software Support | Run any OS/software | NAS OS + limited apps |
| Initial Setup | Manual (OS install, config) | Simple (guided setup) |
| Cost | Variable (can reuse old hardware) | Mid to high (for good models) |
| Maintenance | Needs updates, backups, and troubleshooting | Mostly automatic |
When Home Server Is Better
- You want to run many different apps and services
- You like experimenting or learning about technology
- You need to run virtual machines or custom Docker containers
- Hardware upgrades are important
When Nas Is Better
- You want reliable, easy backups and file sharing
- You have little time or tech knowledge
- You need a device that “just works” with minimal setup
- Energy use and noise matter
Self-hosting Docker: Home Server vs. NAS
Docker lets you run apps in isolated containers. This is great for home labs because you can deploy many services (like Plex, Nextcloud, Home Assistant) without software conflicts.
Docker On Home Servers
Home servers are ideal for Docker. You can:
- Run many containers at once
- Use Docker Compose for advanced setups
- Access all Docker features (volumes, networks, custom images)
- Update and troubleshoot easily
Popular Linux distros for Docker include Ubuntu Server, Debian, and CentOS. You can also run Docker on Proxmox VE or even Windows.
Example: Media Stack With Docker
A home server can run a full media stack using Docker Compose:
- Plex for streaming
- Sonarr/Radarr for TV and movie management
- QBittorrent or NZBGet for downloads
- Jellyfin as an open-source Plex alternative
You can add or remove services in minutes.
Non-obvious Insight: Resource Isolation
Docker containers use your server’s resources. If you run too many heavy containers (like databases or Plex with hardware transcoding), you’ll need a strong CPU and enough RAM. Many beginners underestimate this and run into slowdowns. Always monitor resource use with tools like htop or Portainer.
Docker on NAS
Many modern NAS devices (especially Synology and QNAP) now support Docker. However, there are limits:
- Not all NAS CPUs are powerful (many use ARM or low-end Intel/AMD chips)
- Some advanced Docker features are missing or locked by the NAS OS
- Upgrading Docker or images depends on the NAS vendor
Example: Home Assistant on NAS Docker
You can run Home Assistant in a Docker container on a Synology NAS. This works well for basic automation, but if you need lots of add-ons or custom integrations, you might hit resource limits.
Non-obvious Insight: NAS Docker Limits
Most entry-level NAS boxes are not designed for heavy Docker use. You can run a few simple containers, but high-demand apps (like Plex with multiple streams or large databases) may struggle. Before buying, check the NAS CPU model and RAM options.
Running Virtual Machines: Home Server vs. NAS
Virtual machines (VMs) let you run full operating systems as “computers inside your computer.” This is useful for testing, development, or running apps that need a different OS.
Virtual Machines On Home Servers
Home servers shine at virtualization. Popular VM software includes:
- Proxmox VE (free, open source, web UI)
- VMware ESXi
- VirtualBox (for desktops)
- KVM/QEMU
With enough RAM and CPU, you can run many VMs at once: Windows, Linux, BSD, or even older OSes for retro software.
Example: Home Lab With VMs
A tech hobbyist might run:
- A Windows 10 VM for remote desktop
- A Linux VM for web development
- A pfSense VM for firewall and VPN
- A TrueNAS VM for network storage
You can clone VMs, snapshot them, and isolate networks for safe testing.
Non-obvious Insight: Storage And Snapshots
Running VMs on spinning hard drives can be slow. SSDs make a big difference, especially for disk-heavy tasks. Also, snapshots (saving VM states) use extra storage—plan for this when sizing your drives.
Virtual Machines on NAS
Some high-end NAS models (like Synology Plus or QNAP x86) support basic VM hosting. However:
- Most NAS CPUs are not designed for heavy VM workloads
- RAM is often limited
- Management features are simpler than Proxmox or VMware
Example: Light Vm On Nas
A Synology DS920+ can run a simple Ubuntu or Windows VM for light tasks (like a small web server or testing environment). It’s not suited for running many VMs or resource-heavy apps.
Non-obvious Insight: Shared Storage Vs Compute
NAS is built for storage, not compute. Running VMs on a NAS can impact file-sharing performance, especially if both are active at once. If your main goal is virtualization, a home server is almost always better.
Home Lab Use Cases: Which To Choose?
A home lab is a space to learn, test, and experiment with tech. Your choice depends on your goals.
Home Lab With Home Server
Best for:
- Learning Docker, Kubernetes, or virtualization
- Running multiple VMs or heavy apps
- Building custom networks and firewalls
- Hosting websites, APIs, or development tools
You can simulate a real data center at home. Many IT professionals use Proxmox or ESXi to practice skills.
Home Lab With NAS
Best for:
- Simple file sharing and backups
- Trying a few Docker apps (like Home Assistant or Plex)
- Syncing files with cloud services
- Light VM testing (on higher-end models)
NAS is less flexible, but it’s a good starting point for beginners who want reliable storage with some extra features.
Cost Breakdown: Home Server vs. NAS
Budget is important when setting up your digital home base. Here’s a practical cost comparison for typical setups:
| Component | Home Server | NAS |
|---|---|---|
| Entry-Level Hardware | $200–$400 (used/refurbished PC) | $200–$350 (2-bay NAS, no drives) |
| Mid-Range Hardware | $500–$800 (mini PC, custom build) | $400–$700 (4-bay NAS, no drives) |
| High-End Hardware | $1000+ (server-grade hardware) | $800+ (business/pro NAS, no drives) |
| Storage Drives | $50–$120 per TB | $50–$120 per TB |
| Power Usage | 30–100W (varies by hardware) | 10–30W (very efficient) |
A used or refurbished desktop can be a cheap home server. For NAS, you pay for convenience, but some features (like Docker or VM support) require mid-range or high-end models. Remember to include drive costs—storage is often the largest expense.
Setting Up Your Home Server: Step-by-step
Ready to build a home server? Here’s a clear guide to get started.
- Choose Hardware
- Old desktop, mini PC, or used server
- At least a dual-core CPU, 8GB+ RAM, SSD for boot, and HDDs for storage
- Pick Your Operating System
- Proxmox VE: Best for VMs and containers
- Ubuntu Server: Great for Docker and general use
- TrueNAS Scale: Storage-focused, supports Docker
- Install the OS
- Create a bootable USB drive with the OS image (use Rufus or BalenaEtcher)
- Boot the server and follow install steps
- Set Up Storage
- Format drives (ext4, ZFS, or Btrfs are good for Linux)
- Mount storage for Docker and VMs
- Set Up Networking
- Assign a static IP address for easy access
- Open ports as needed (router setup)
- Install Docker and/or VM Software
- For Docker: `sudo apt install docker.io` (Ubuntu)
- For Proxmox: Web UI for VM and container management
- Secure Your Server
- Change default passwords
- Enable firewalls (UFW on Linux)
- Set up automatic updates
- Start Hosting Services
- Use Docker Compose for multi-app setups
- Create VMs for testing or special apps
- Monitor and Backup
- Use tools like Portainer, Cockpit, or Grafana for monitoring
- Schedule regular backups of important data
Tip: Start Small
Don’t try to host everything at once. Start with a single service (like Plex or Nextcloud), learn the basics, then add more as you get comfortable.
Setting Up Your NAS: Step-by-step
NAS setup is simpler but still worth planning.
- Buy the Right NAS
- Choose a brand/model with enough drive bays and CPU/RAM for your needs
- Check for Docker/VM support if needed
- Install Hard Drives
- Follow the NAS guide to insert drives
- Choose RAID type (RAID 1 for safety, RAID 5/6 for large setups)
- Complete Setup Wizard
- Connect to your network, power on, and use the web interface
- Create user accounts, set permissions
- Configure Storage Pools and Shares
- Set up shared folders for media, backups, and documents
- Install Apps
- Use the NAS “app store” to add Plex, Docker, Home Assistant, etc.
- Set Up Backups and Sync
- Enable PC and phone backups
- Set up cloud sync if needed
- Secure Your NAS
- Use strong passwords
- Set up 2FA if available
- Limit remote access
- Monitor Health
- Enable drive health checks and alerts
- Update firmware regularly
Tip: Use Vendor Forums
Most NAS brands have active user forums with guides and troubleshooting help. These are great resources if you get stuck.
Data Protection: Raid, Backups, And Snapshots
Storing data safely is a top concern. Here’s how home servers and NAS handle it.
Raid
RAID spreads data across multiple disks for speed or safety.
- RAID 1: Mirrors data (needs 2+ drives), safe if one fails
- RAID 5/6: Spreads data and parity, survives one/two drive failures
- RAID 10: Combines speed and safety, uses 4+ drives
Home servers and NAS both support RAID, but NAS makes setup easier through its web interface. Home servers offer advanced options (like ZFS or Btrfs) for snapshots and self-healing data.
Backups
RAID is not a backup. Always keep a separate copy of important data:
- To an external drive (USB)
- To another NAS or server
- To the cloud (Google Drive, Backblaze, Wasabi)
Both the home server and NAS can run backup jobs on a schedule. Don’t skip this step—hardware fails, and ransomware can strike.
Snapshots
Snapshots capture the state of your data at a point in time. If you delete or corrupt files, you can roll back. ZFS (TrueNAS, Proxmox) and Btrfs support snapshots. Many NAS devices offer a simple snapshot feature in their UI.
Non-obvious Insight: Test Restores
Backups and snapshots are only useful if they work. Test restoring files regularly. Many users skip this, only to find backups broken when they’re needed most.
Networking And Remote Access
Both home server and NAS can serve your home network, but remote access brings extra steps.
Local Access
- Use static IP addresses for easy management
- Access shared folders over SMB, NFS, or AFP
- Use web dashboards for apps and settings
Remote Access
- Set up a VPN for secure remote access (OpenVPN, WireGuard)
- Use dynamic DNS (DDNS) if your home IP changes
- Forward ports carefully; don’t expose admin interfaces to the internet
NAS devices often include cloud-based remote access tools. Home servers require manual setup but offer more control and security.
Non-obvious Insight: Double Nat Problems
If your router is behind another device (like in apartment buildings), you may face “double NAT. ” This can block remote access. Workarounds include using a VPN, IPv6, or contacting your ISP.
Energy Use And Noise
Running devices 24/7 has costs. Here’s what to expect.
- Home servers: Use more power (30–100W), can be noisy if using desktop/server hardware
- NAS: Very efficient (10–30W), quiet fans, designed for bedrooms or offices
If you want a silent setup, NAS is often better. For home servers, use low-power CPUs (like Intel NUCs or mini PCs) and SSDs to cut noise and heat.
Expanding Your Home Lab: Beyond Basics
Once you have your server or NAS running, you can explore advanced projects:
- Home automation: Home Assistant, Node-RED
- Private cloud: Nextcloud, Seafile
- Network monitoring: Pi-hole, Grafana, Prometheus
- Development: GitLab, Jenkins, code servers
- Game servers: Minecraft, Valheim, Factorio
Home servers handle these with ease. NAS can run some, but check app compatibility and performance first.
Security Best Practices
Protecting your data and privacy is vital.
- Use strong passwords and unique accounts for each service
- Enable firewalls and close unused ports
- Keep software updated (OS, Docker, NAS firmware)
- Use 2FA (Two-Factor Authentication) where possible
- Back up configuration files as well as data
For remote access, VPN is safer than opening web interfaces to the internet. Always monitor logs for unusual activity.
Example Home Lab Builds
Here are two example setups for different users.
Example 1: Power User Home Server
- Hardware: Used Dell Optiplex mini-tower, Intel i5, 16GB RAM, 2x SSDs (OS + cache), 2x 4TB HDDs (RAID 1)
- OS: Proxmox VE
- VMs: PfSense firewall, Windows 10, Ubuntu for development
- Docker: Plex, Sonarr, Radarr, Nextcloud, Home Assistant
- Network: Static IP, VLANs for lab isolation
- Backups: Weekly to USB drive, monthly to cloud
Example 2: Simple Family Nas
- Hardware: Synology DS220+, 2x 6TB HDDs (RAID 1)
- Apps: Plex (Docker), Home Assistant (Docker), Synology Photos, Cloud Sync
- Network: Plugged into router, auto backups for family phones
- Backups: Monthly to external USB, cloud sync with Google Drive
Common Mistakes To Avoid
1. Ignoring Backups
Many users trust RAID, but don’t back up. Always have a separate backup.
2. Underestimating Power Needs
Running too many VMs or Docker containers on weak hardware causes crashes.
3. Exposing Admin Interfaces
Never open SSH, Proxmox, or NAS admin pages to the internet without VPN.
4. Skipping Updates
Old software has security risks. Update your OS, apps, and firmware.
5. Neglecting Cooling
Packed drives and CPUs get hot. Use good airflow and monitor temperatures.
6. Not Planning For Growth
Start with more storage than you think you need. Data grows fast.
Choosing The Right Solution For You
Think about your main goals:
- Want to experiment, learn, and grow? The home server is best.
- Want easy setup and low maintenance? NAS fits.
- Need both? Some users combine both—a NAS for storage and a home server for apps and VMs.
Future-proof by choosing hardware with upgrade options. Review forums, read user reviews, and check compatibility lists before buying.
Resources For Getting Started
Learning more helps you avoid mistakes and get the most from your setup. For deep dives on home servers and NAS, see the comprehensive guides at Arch Linux Wiki.
Frequently Asked Questions
What Is The Main Difference Between A Home Server And A Nas?
A home server is a general-purpose computer you can customize for many tasks, like running VMs, Docker, and different apps. A NAS is designed mainly for network storage and file sharing, with some extra features like Docker support on newer models.
Can I Run Both Docker And Virtual Machines On A Nas?
Some higher-end NAS devices support both Docker and basic VMs, but they have hardware limits. For many containers or heavy VMs, a home server is more suitable.
Is A Home Server Safe To Use 24/7?
Yes, with good hardware and cooling, a home server can run all day. Use energy-efficient parts, keep it dust-free, and monitor temperatures. Regular updates and backups keep your data safe.
How Much Does It Cost To Build A Basic Home Lab?
A simple home server can cost as little as $200 (using old or refurbished hardware). Entry-level NAS devices start around $200, not including hard drives. Add more for storage and network gear as you expand.
Which Is Better For Beginners: a home server or an NAS?
A NAS is easier for beginners, thanks to simple setup and guided apps. If you want to learn more about computers, Linux, or networking, a home server gives you more freedom and skills for the future.
Setting up your own home lab is rewarding and opens the door to many tech projects. Start with your main needs, keep data safe, and enjoy building your digital home base.